

Caution and Safety Instructions
- Qualified personnel must install and/or service product in a manner consistent with its intended use and in compliance with the National Electrical Code, Canadian Electrical Code, and/or all local and provincial codes.
- Follow all product label information and installation instructions.
- Turn off power at fuse or circuit breaker before installation or servicing.
- The use of damaged components may cause an unsafe condition and void product warranty.
- Do not block light emanating from product in whole or part.
- Never operate the luminaire with missing or damaged lens. Clean lens on a regular basis.
- Entire luminaire may become extremely hot. Do not touch hot lens or luminaire body. Do not touch the light source at any time.
- Keep all O-rings and sealing surfaces clean during installation and servicing; failure to do this may lead to premature failure of the product.
1
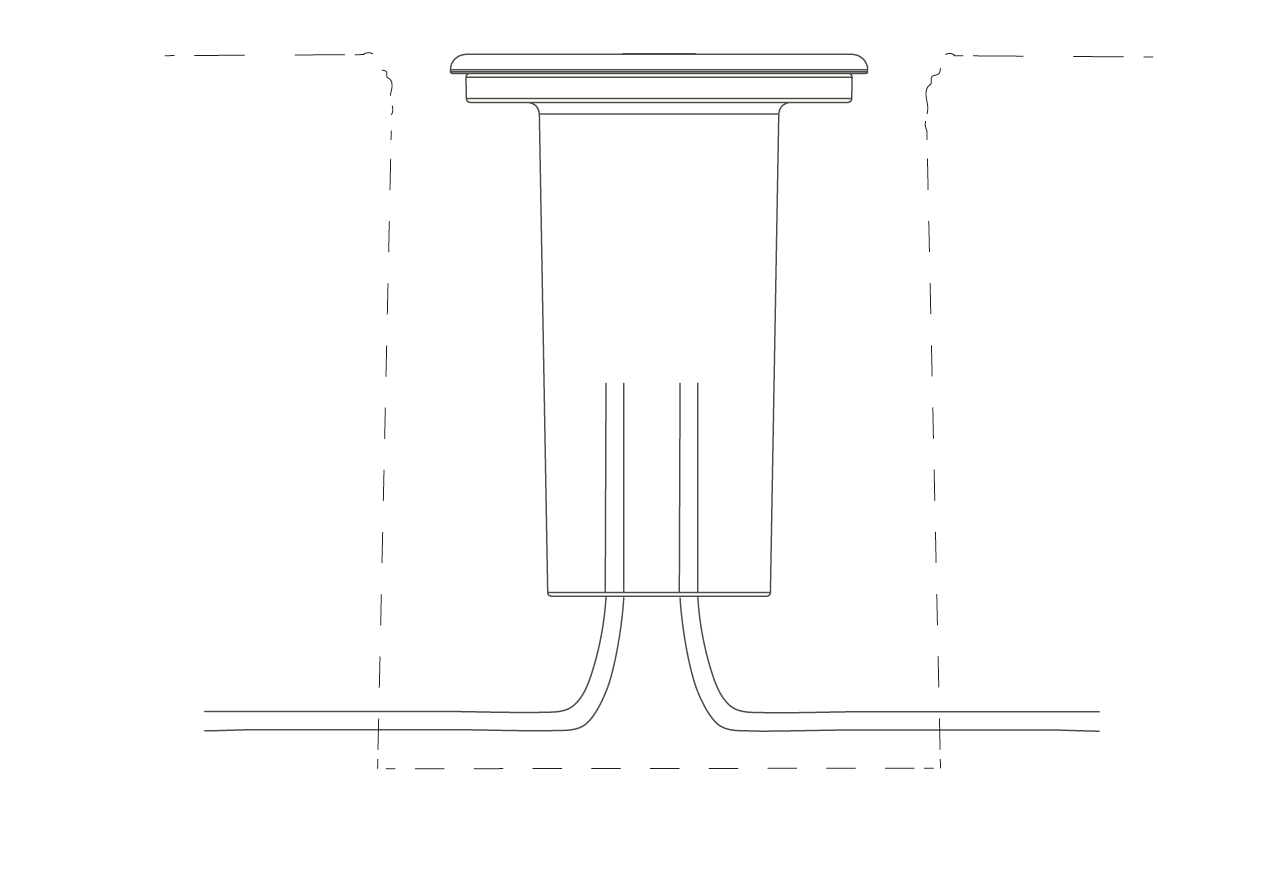
Secure the driver housing in-ground in accordance with local codes and regulations.
2
Connect conduit or cable runs to the bottom of the driver housing with couplings (1/2"-14 NPT – provided by others). Use the provided ½"-14 NPT plug for unused conduit openings.
3
Add the installation cover onto the driver housing with the provided fasteners to prevent dirt and debris from entering the driver housing.
4
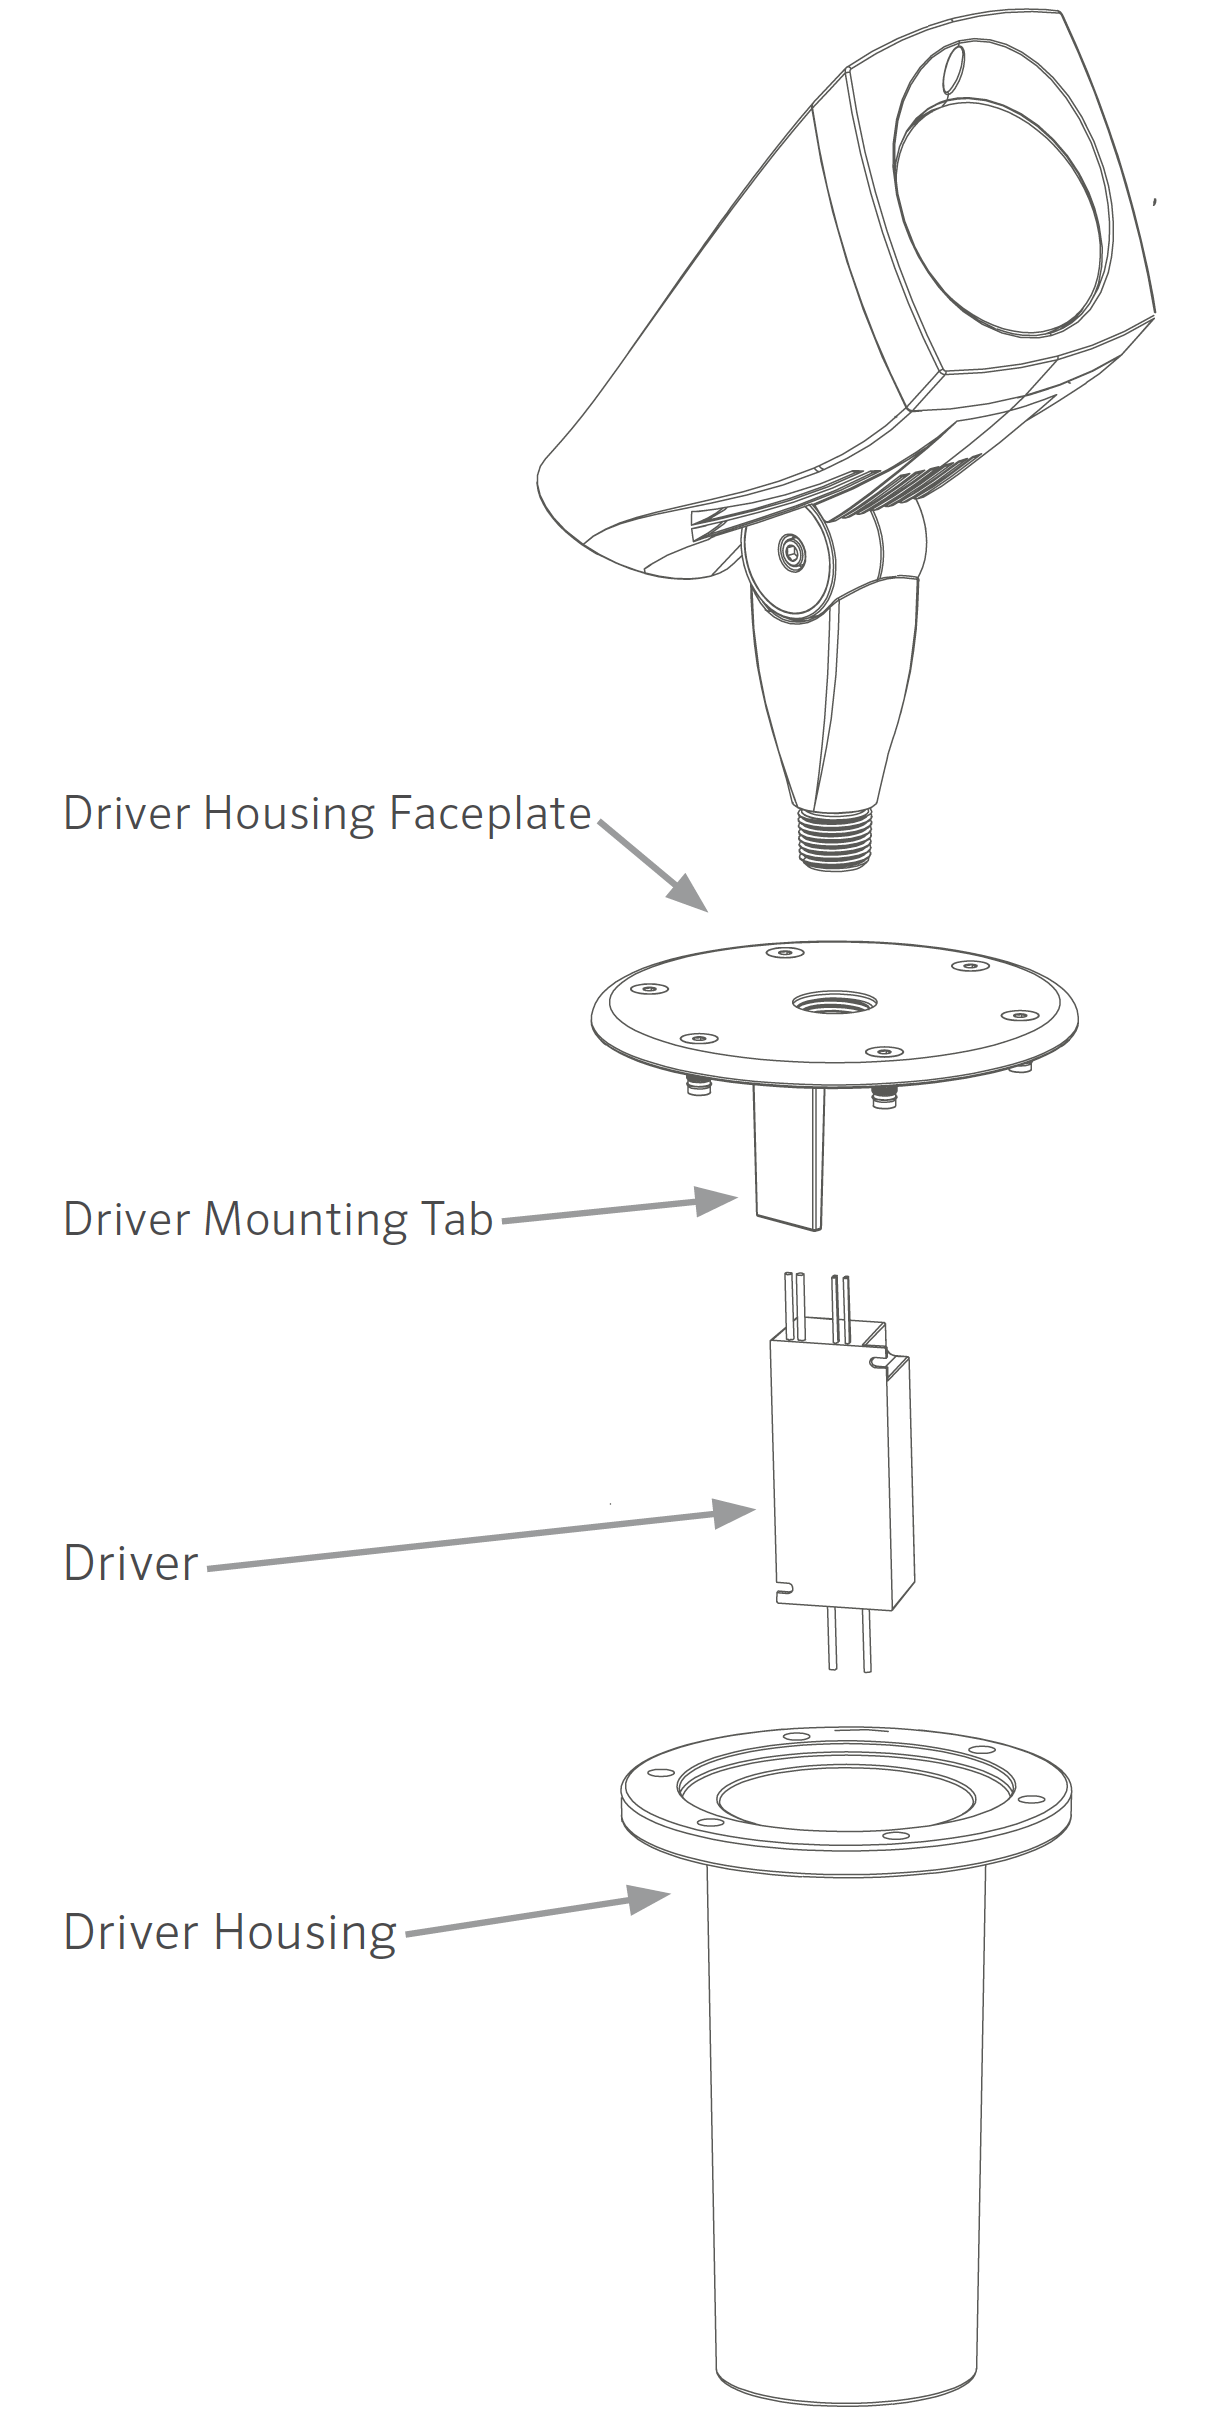
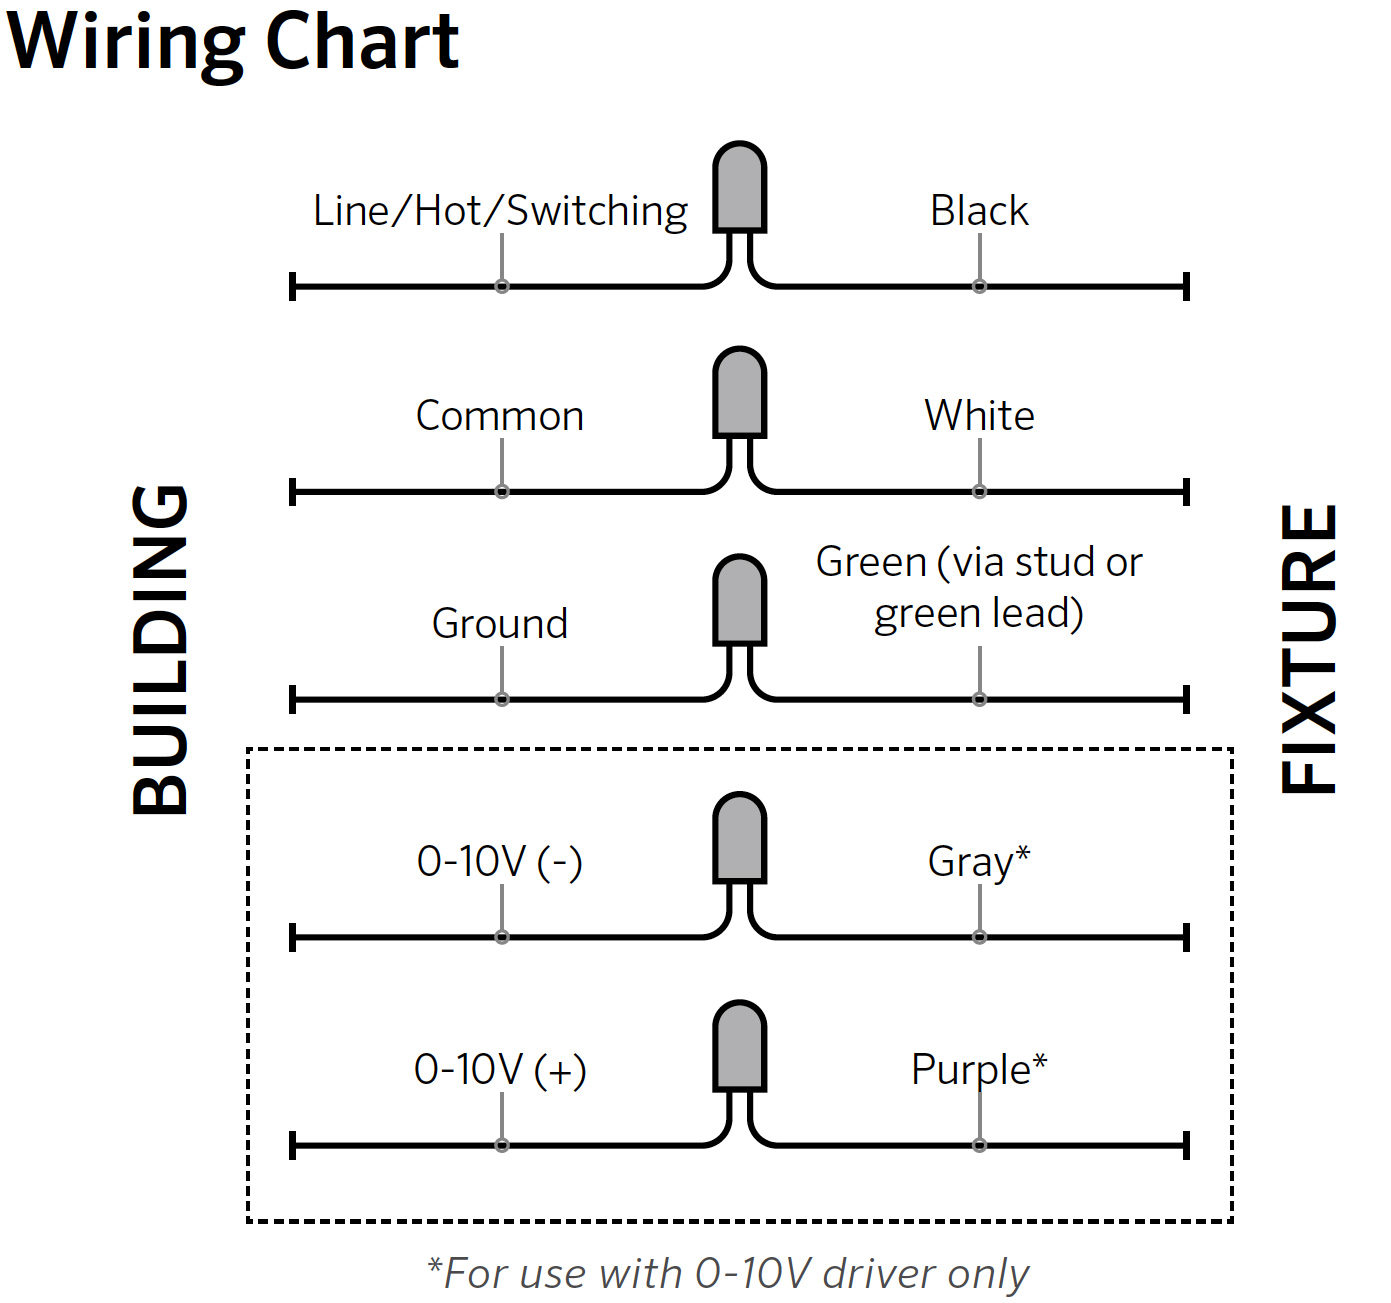
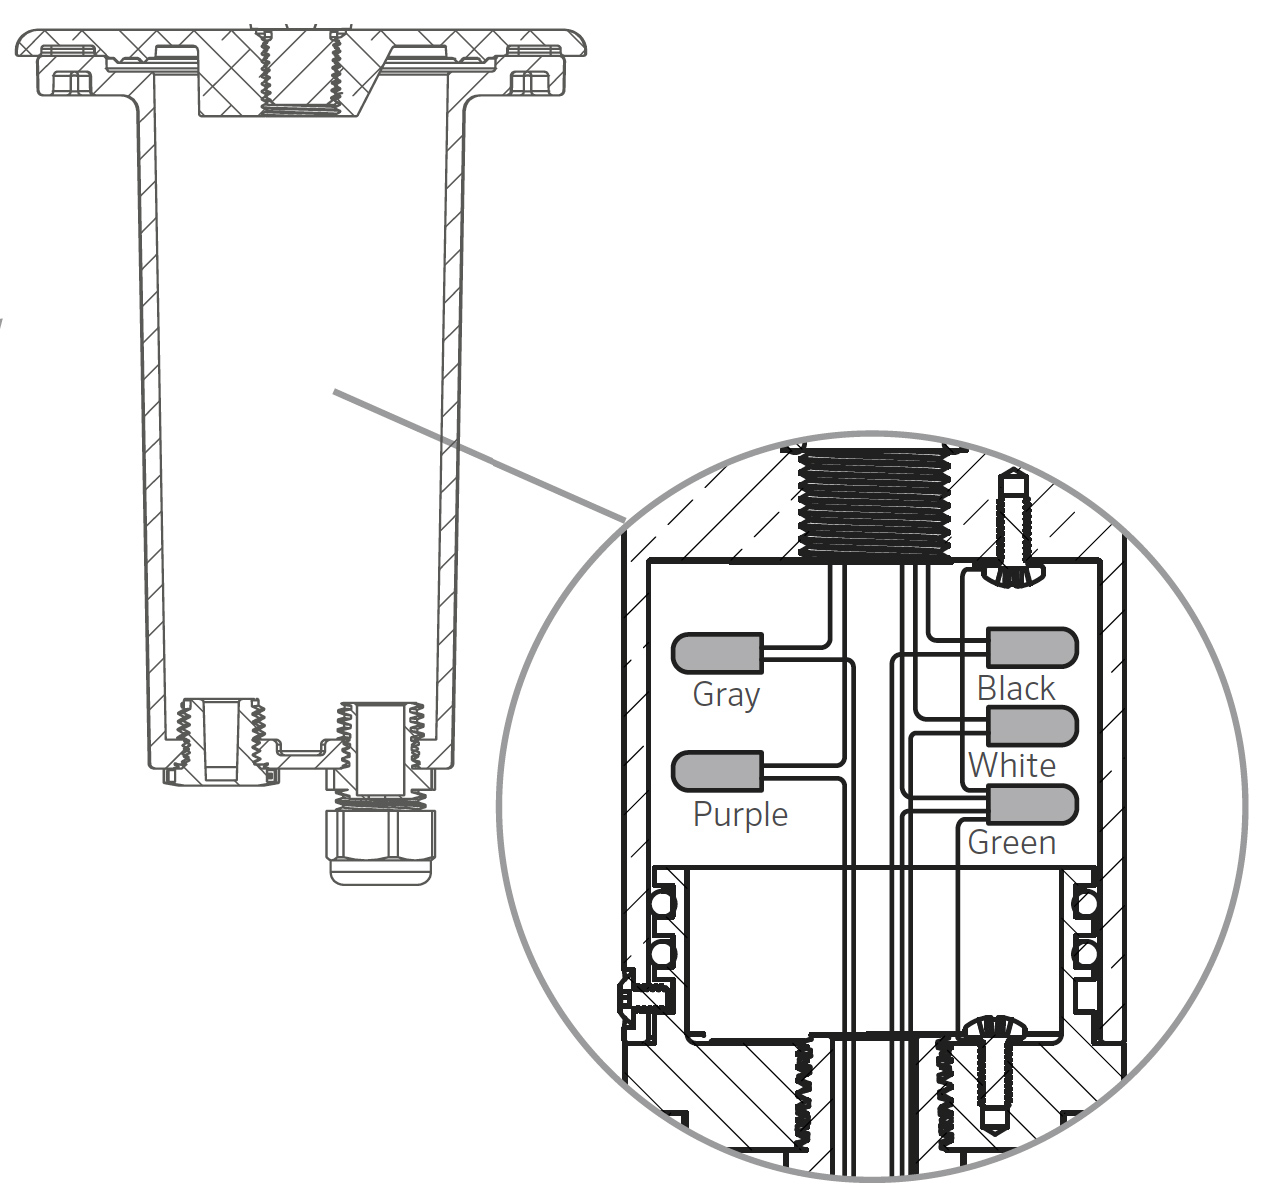
To complete the installation, attach the luminaire to the driver housing faceplate. Connect the driver wiring (provided with the luminaire) to the luminaire using the wiring diagram and approved wire connectors.
5
Use double-sided tape and a zip tie to secure the driver to the driver mounting tab.
6
Tighten the 8-32 x ½" set-screw using a 5/64" Allen wrench to lock the rotational position of the luminaire to the driver housing faceplate.
7
Seal the driver housing compartment using the provided gasket and fasteners (10-24 x ½" screw) with a 1/8" Allen wrench.
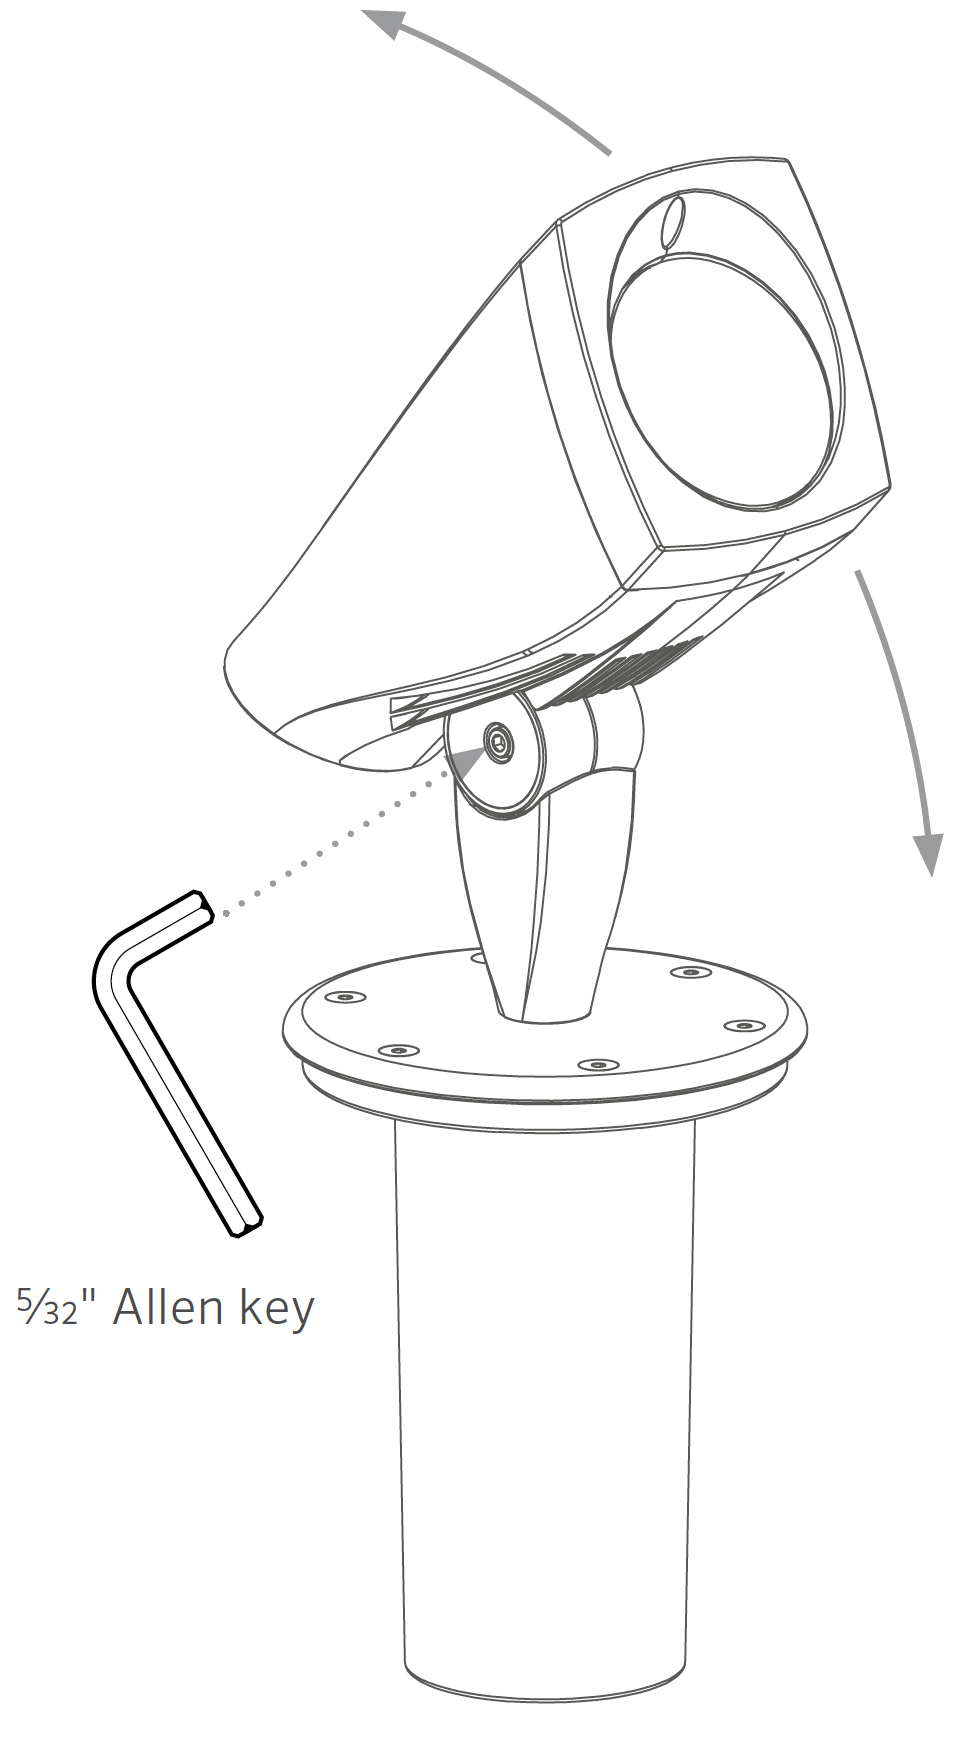
Upon installation, use a 5/32" Allen key to adjust the angle of the fixture.
Still need help? We're here.
Tell us what you need support with and we'll find the best solution for you.