Filter

Support
Strip Lights

SRP-CC - Install Notes

Tabs

Read Article

The SRP-CC Strip Light Color Controller requires the SRP-RGBW fixture to operate correctly. This is compatible with all lighting transformers, including the EX Transformer, PX Transformer, DX Controller, and Luxor® Controller from FX Luminaire. It is compatible only with the FX Luminaire SRP RGBW Strip Light. To power the controller, connect its low-voltage wires to the output (common and voltage taps) of the low-voltage transformer.

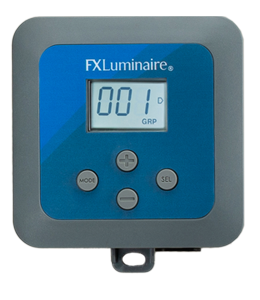
The SRP-CC display illuminates only if the low-voltage transformer is supplying output voltage (minimum 12 VAC).

Controller Mounting Setting Up Standalone Mode Setting Up Luxor Mode Strip Light Installation

Controller Mounting


  1. Drill ⅛" (3 mm) pilot holes into the mounting surface. Insert anchors and install screws into the anchors, leaving approximately ⅛" of thread exposed. Mount the controller.
  2. Mark locations for the bottom anchors with a permanent marker.
  3. Remove the controller from the wall. Drill bottom anchor holes and install the anchors.
  4. To secure the controller to the wall, place it back on top of the anchors.
  5. Install the screw(s) into the anchors at the bottom of the controller.


Setting Up Standalone Mode

The stand-alone mode option works with any low-voltage transformer (e.g., EX, DX, PX, etc.).

NOTE: The max run length of fixture is 20’ per SRP-CC.

  1. Attach the SRP-CC low-voltage wires to the output taps or field wires connected to the on-site low voltage transformer.
  2. To power the SRP RGBW Strip Light, connect the SRP-CC power feed cable to the strip light power feed cable.
  3. Turn on the low-voltage transformer manually to confirm the output voltage is at least 12 VAC.
  4. Confirm that the SRP-CC display is illuminated.
  5. Verify that the Hue, Saturation, or Intensity are displayed. This confirms that the SRP-CC is in Standalone Mode.
  6. If GRP (Luxor Mode) is displayed, press the Mode button to see the Hue, Saturation, or Intensity values.
  7. Once in Standalone Mode, the SRP-RGBW Strip Light will illuminate according to the selected Hue, Saturation, and Intensity values.
  8. To toggle between Hue, Saturation, and Intensity, press the Select button. The current selection will be displayed at the bottom of the screen.
  9. Use the Plus and Minus buttons to adjust the Hue, Saturation, and Intensity values.
  • Hue: 0 to 360
  • Saturation: 0 to 100
  • Intensity: 0 to 100

Setting Up Luxor Mode


NOTE: The max run length of fixture is 20’ per SRP-CC.

  1. Attach the SRP-CC low-voltage wires to the output taps (Common and 15 V) or field wires connected to the on-site Luxor Controller.
  2. To power the SRP RGBW Strip Light, connect the SRP-CC power feed cable to the strip light power feed cable.
  3. Turn on the Luxor Controller manually to confirm the output voltage is at least 12 VAC.
  4. Confirm that the SRP-CC display is illuminated.
  5. Confirm that GRP (Luxor Mode) is displayed at the bottom of the screen.
  6. If HUE, SAT, or INT is displayed, press MODE  to show GRP. This confirms that the SRP-CC is in Luxor Mode.
  7. Once in Luxor Mode, the SRP-RGBW Strip Light will be controlled using the Luxor Controller. Set GRP to the desired group. Use  and to adjust the group number (1–250). The SRP-CC Controller and SRP-RGBW Strip Light will only work with the Luxor Controller if the assigned group is activated. This fixture should not be mixed with other fixture group numbers.
  8. Program the color and intensity using the Luxor Controller interface or Luxor App.

NOTE: The Select button is not used in Luxor Mode.

Rate this Article: 
0
No votes yet

Was this article helpful? Yes | No